Butterfinger Balls
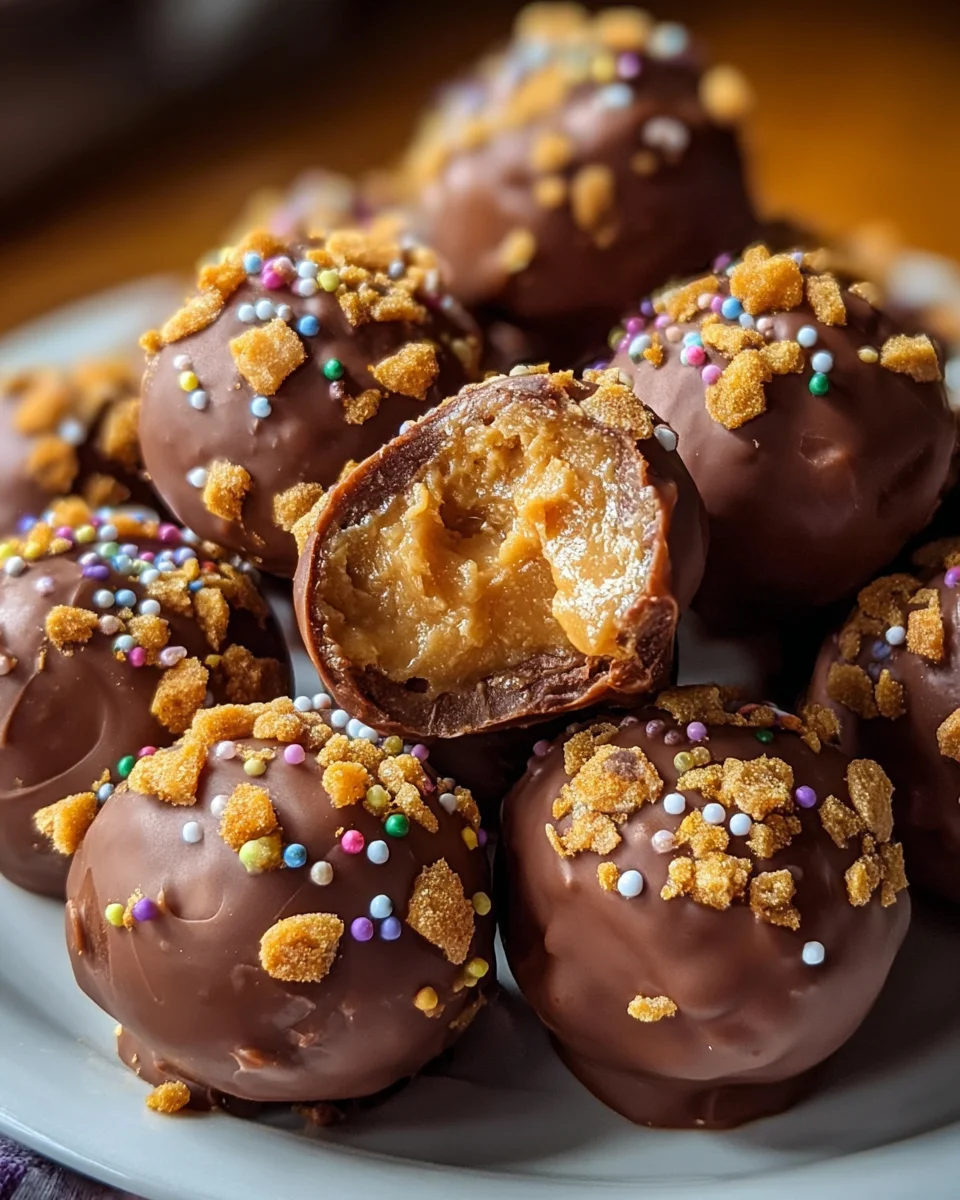
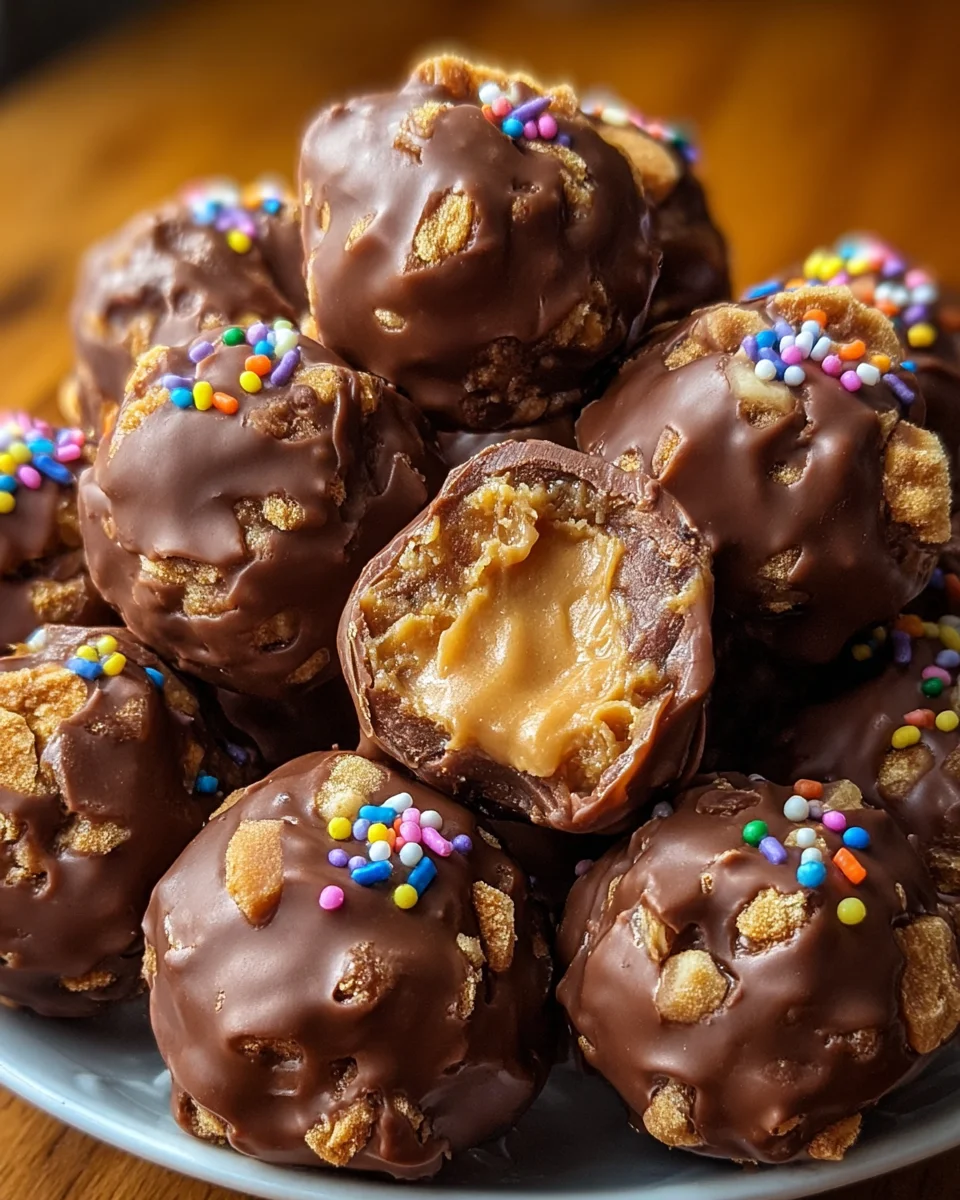
Indulge your taste buds with these irresistible Butterfinger Balls, where creamy peanut butter harmoniously melds with the crunch of graham crackers and Butterfinger candy bars, all cloaked in sumptuous melted chocolate. Perfect for social soirées and festive occasions, these heavenly morsels will vanish before you know it!
Why You’ll Love This Recipe
- Quick and Easy: With just a few simple steps, you can whip up these delightful treats in no time.
- Irresistible Flavor: The combination of peanut butter, chocolate, and Butterfinger creates a flavor explosion that everyone will love.
- Versatile Treat: Perfect for parties, holidays, or as a sweet snack at home; they fit any occasion!
- Kid-Friendly Fun: Get the little ones involved in shaping and decorating their own Butterfinger Balls.
- Make Ahead Option: These treats can be prepared in advance and stored, making them convenient for busy days.
Tools and Preparation
Before diving into this delicious recipe, gather your tools to ensure a smooth preparation process.
Grab This Chef Knife Now - Almost Gone!
- Stays Razor-Sharp: Ice-hardened blade keeps its edge longer than ordinary knives
- Superior Grip Control: Unique finger hole design gives you perfect balance and safety
- Built to Last a Lifetime: Premium stainless steel blade with elegant beech wood handle
Customer Reviews ★★★★★
Essential Tools and Equipment
- Mixing bowl
- Electric or stand mixer
- Cookie sheet
- Parchment paper
- Microwave-safe bowl
Importance of Each Tool
- Mixing bowl: Essential for combining ingredients efficiently without mess.
- Electric or stand mixer: Saves time and ensures a perfectly blended mixture with minimal effort.
- Cookie sheet: Provides a sturdy base for shaping and freezing your Butterfinger Balls.
- Parchment paper: Prevents sticking and makes cleanup easier after coating in chocolate.
Ingredients
Ingredients:
– 4 tablespoons softened butter (½ stick)
– 1 teaspoon vanilla extract
– 8 ounces chocolate bark or chocolate chips
– ½ cup Butterfinger bars (crushed)
– 1 cup powdered sugar
– 1 cup peanut butter (avoid all-natural varieties)
– ¾ cup crumbs from graham crackers
– Optional garnishes: additional crushed Butterfinger bars, festive sprinkles, or coarse sea salt
How to Make Butterfinger Balls
Step 1: Prepare the Dough
In a mixing bowl, combine the peanut butter and softened butter. Use an electric or stand mixer set to medium speed and blend until the mixture is creamy and uniform.
Step 2: Add Aromatic Notes
Incorporate the vanilla extract into the dough and blend thoroughly until well combined.
Step 3: Sweeten the Deal
Gradually add the powdered sugar, blending at low speed. Remember to scrape down the sides of the bowl periodically to ensure even mixing.
Step 4: Crunch Time
Gently fold in the graham cracker crumbs and crushed Butterfinger bars, ensuring everything is evenly distributed throughout the mixture.
Step 5: Shape ’em Up
Align a large cookie sheet with parchment paper. Scoop out approximately 1 to 1½ tablespoons of dough, roll into neat balls, and place them on the cookie sheet.
Step 6: Chilling Phase
Freeze the dough balls on the sheet for roughly 30 minutes until they are completely firm.
Step 7: Melting the Chocolate
Once chilled, proceed to melt your chosen chocolate. Utilize a microwave-safe bowl and heat it in 30-second spurts at 50% power, stirring in between each interval. Be cautious not to overheat; some lumps should remain but will melt as you stir.
Step 8: Coat and Decorate
Submerge each chilled ball into the luscious melted chocolate. You can fully coat them or leave a bit of the peanut butter mixture exposed for visual appeal.
Step 9: Finishing Touches
Add a sprinkle of additional crushed Butterfinger bars, holiday-themed sprinkles, or a dash of flaky sea salt for that extra pop of flavor.
Step 10: The Grand Finale
Allow the chocolate to solidify completely before indulging in your delightful Butterfinger Balls. Enjoy!
How to Serve Butterfinger Balls
Butterfinger Balls are a delightful treat that can be enjoyed in various ways. Whether you’re hosting a party or simply satisfying a sweet tooth, these treats can be the star of the show. Here are some creative serving suggestions.
At Parties
- Buffet Table Highlight: Arrange your Butterfinger Balls on a decorative platter for guests to grab and enjoy.
- Themed Dessert Table: Incorporate them into a dessert table with other sweets, creating an eye-catching display.
With Coffee or Tea
- Afternoon Snack: Serve alongside coffee or tea for a delightful afternoon pick-me-up.
- Sweet Treat for Guests: Pair with hot beverages when entertaining friends, adding a touch of sweetness to the experience.
Gift Giving
- Homemade Gifts: Pack Butterfinger Balls in decorative boxes as homemade gifts for holidays or special occasions.
- Party Favors: Wrap them individually in cellophane and tie with ribbons for memorable party favors.
How to Perfect Butterfinger Balls
To ensure your Butterfinger Balls are truly irresistible, consider these tips for perfection.
- Use Room Temperature Ingredients: Make sure your butter and peanut butter are at room temperature for easier mixing.
- Chill the Dough: Chilling the dough before rolling helps maintain shape and makes it easier to work with.
- Choose Quality Chocolate: Select high-quality chocolate for melting; it enhances the overall flavor of your Butterfinger Balls.
- Experiment with Toppings: Try different toppings like crushed nuts or coconut flakes for unique variations on this classic treat.
Best Side Dishes for Butterfinger Balls
While Butterfinger Balls are delicious on their own, pairing them with complementary side dishes can elevate your dessert experience. Here are some great options to consider.
- Fresh Fruit Salad: A light, refreshing fruit salad balances the sweetness of Butterfinger Balls.
- Vanilla Ice Cream: The creamy texture of vanilla ice cream pairs perfectly with the crunchy treats.
- Chocolate Dipped Strawberries: For a decadent combination, serve fresh strawberries dipped in chocolate alongside your Butterfinger Balls.
- Cheese Platter: A selection of cheeses provides a savory contrast that enhances the sweetness of the dessert.
- Coffee Cake: A slice of moist coffee cake can complement your treats during brunch gatherings.
- Milkshake: Pairing these sweets with a rich milkshake creates an indulgent dessert experience.
Common Mistakes to Avoid
Making Butterfinger Balls can be simple, but a few common mistakes can hinder your results. Here are some pitfalls to watch out for:
- Using all-natural peanut butter: This type of peanut butter can alter the texture of your balls. Stick with traditional peanut butter for the best results.
- Skipping the chilling step: Not freezing the dough balls before coating them in chocolate can lead to messy results. Always chill for at least 30 minutes for firm and easy handling.
- Overheating the chocolate: If you melt the chocolate too quickly, it can seize up. Use low power and short heating intervals to keep it smooth.
- Not scraping the bowl: Failing to scrape down the sides while mixing can leave lumps in your dough. Regularly scrape to ensure a uniform mixture.
- Neglecting garnishes: Leaving out optional garnishes can make your Butterfinger Balls less appealing. A sprinkle of crushed Butterfinger or sea salt elevates both flavor and look!
Storage & Reheating Instructions
Refrigerator Storage
- Store in an airtight container in the fridge.
- They will last up to one week.
Freezing Butterfinger Balls
- Place them in a single layer on a cookie sheet until frozen solid.
- Transfer to a freezer-safe bag or container; they will last up to three months.
Reheating Butterfinger Balls
- Oven: Preheat to 350°F (175°C) and warm for about 5-10 minutes.
- Microwave: Heat on medium power for 15-20 seconds until just warm.
- Stovetop: Place in a pan over low heat, stirring occasionally until warmed through.
Frequently Asked Questions
Here are some common questions about making Butterfinger Balls.
What are Butterfinger Balls?
Butterfinger Balls are delightful treats made from peanut butter, crushed graham crackers, and Butterfinger bars, coated in chocolate.
Can I customize my Butterfinger Balls?
Absolutely! You can add nuts, swap out different candies, or use dark chocolate instead of milk chocolate for a twist.
How do I make my Butterfinger Balls healthier?
Consider using reduced-fat peanut butter and sugar alternatives, but keep in mind this may change the texture slightly.
Can I use other types of candy?
Yes! Feel free to experiment with other candy bars like Snickers or Reese’s for different flavors.
Final Thoughts
These Butterfinger Bliss Balls offer a perfect balance of sweetness and crunch, making them an irresistible treat for any occasion. Their versatility allows endless customization options, so feel free to add your favorite ingredients. Enjoy making and sharing these delightful bites!

Butterfinger Balls
- Total Time: 20 minutes
- Yield: Approximately 24 servings 1x
Description
Indulge in the delightful world of Butterfinger Balls, a treat that marries creamy peanut butter with crunchy graham crackers and delectable Butterfinger candy bars, all enveloped in rich melted chocolate. These no-bake confections are perfect for parties, holiday gatherings, or simply satisfying your sweet cravings at home. With minimal preparation and simple ingredients, you can create these irresistible snacks that are sure to disappear quickly. Get ready to impress your family and friends with this easy-to-follow recipe that guarantees smiles with every bite.
Ingredients
- 1 cup peanut butter (not all-natural)
- 4 tablespoons softened butter
- 1 cup powdered sugar
- ¾ cup crushed graham crackers
- ½ cup crushed Butterfinger bars
- 8 ounces chocolate bark or chocolate chips
- Optional garnishes: more crushed Butterfinger, sprinkles, or sea salt
Instructions
- In a mixing bowl, blend the peanut butter and softened butter until creamy.
- Mix in vanilla extract and gradually add powdered sugar while stirring.
- Fold in graham cracker crumbs and crushed Butterfinger until evenly combined.
- Roll the mixture into 1 to 1½-inch balls and place them on a parchment-lined cookie sheet.
- Freeze the balls for about 30 minutes to firm up.
- Melt chocolate in a microwave-safe bowl using short intervals; stir until smooth.
- Coat each ball in melted chocolate and place back on the cookie sheet.
- Add optional garnishes before the chocolate hardens completely.
- Prep Time: 20 minutes
- Cook Time: 0 minutes
- Category: Dessert
- Method: No-Bake
- Cuisine: American
Nutrition
- Serving Size: 1 serving
- Calories: 130
- Sugar: 11g
- Sodium: 50mg
- Fat: 7g
- Saturated Fat: 3g
- Unsaturated Fat: 4g
- Trans Fat: 0g
- Carbohydrates: 14g
- Fiber: 1g
- Protein: 3g
- Cholesterol: 5mg

